Showing posts with label Organization. Show all posts

Thursday, March 31, 2016

I'm Just So Biased~

So lately I have been very busy, so I haven't had too much sewing time. 

So I have been focusing on little bedsores and the building blocks of my sewing supply. Namely bias tape. 


Maybe if I pose with it it will look like more of an accomplishment...

I'm new to making bias tape, and I'll tell you there is a learning curve!
But once you get the hang of it it's super easy. 

I like to cut continuous bias tape. 
And to store my homemade bias tape I have a little trick! 

I take the cardboard insert on the inside of the fat quarters and fold it in half.
I cut out a rectangle on the middle and two on the sides like so. 


And I do not use fabric scissors!! 


Then you slip your bias tape into the hole in the center, fold the cardboard in half again and wrap your tape onto your holder. 


Once it's all wrapped up it should look like this~ 


I like to make three sets of continuous bias tape at once.
And then I wind up with little families. 
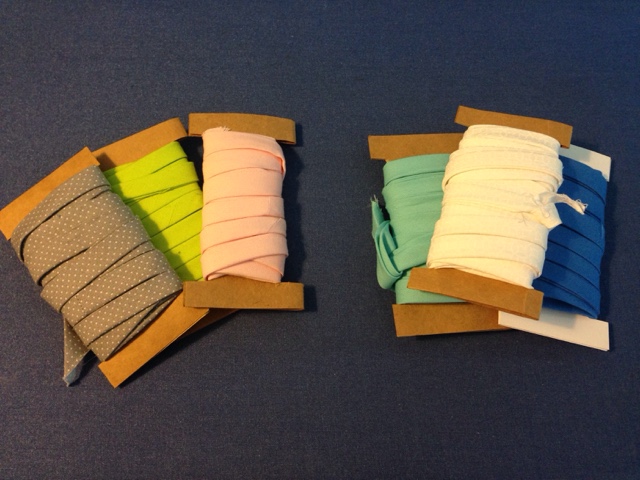


Nifty and organized! 

Do you have any fun tricks that you use bias tape for?
Do you have any favorite Bias related projects?

I would love to hear from you crafty cats.


Friday, February 5, 2016

The best gift for the best sister.

My sister is a freak for organization
And lately I'm a freak for making bags. 

You see where this is going right? 

I made my staple box bag, a makeup brush roll, as well as a taller bag. 


The box bag is nothing new, but I must say I'm proud of this lining. 


And the pull tags. 

This makeup brush was something all new for me. 


I cut out a rectangle of my outer fabric, my lining fabric and of some felt. 
This did need some interfacing. 

I sandwiched them together and I finished the edges with bias tape. 

And that yellow strip to hold the brushes is fold over elastic. 


Which is by the way not iron safe...

And my tall bag was simply an experiment to use up the rest of my fabric. 


This is not interfaced as well, but it holds its shape nicely. 

~All in all this is a pretty swell gift set~


Thursday, January 21, 2016

Another excuse to buy candy.

In mid-project I decided to organize my ribbons.
It was a well needed 

I decided that I wanted to be able to easily browse my ribbons and notions.

I also wanted to buy gummy Sharks.

So I up-cycled the cardboard container for the gummy into a ribbon holder. 


So neat and tidy~ 

For this tutorial you'll need

~unruly ribbons~
~a candy box~
~scissors~
~and tape~

First you cut off the sides of your box 


Then you use some kind of straight edge to mark were your notches will  go.


I used the skinny side of the box. Even though there was a perfectly good ruler in the drawer next to me. 

 Oh well. 

Cut your notches. 


Tape your ribbon to the card. It makes it easier to wrap it. 


Then you just wrap it and tie it off when you get to the end of the ribbon. 


Cerial boxes work just as well, but candy is more fun! 

How do you store your ribbons? I have seen lots of great methods.

Translate