Monday, February 29, 2016

Easter bags for sale!!


As you know if you keep up on my blog I make a lot of gifts for people, it's my favorite thing to do! So I figured I would sell some cute little Easter themed gift bags. 
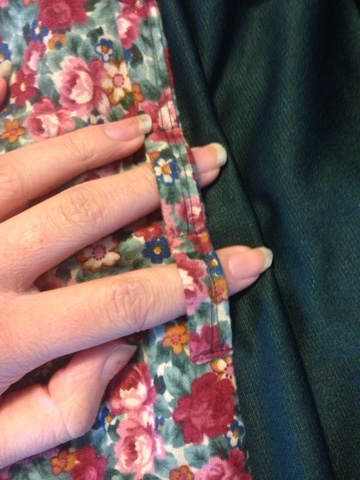
In pink


Or blue 


They are 20$ each and come with~ 


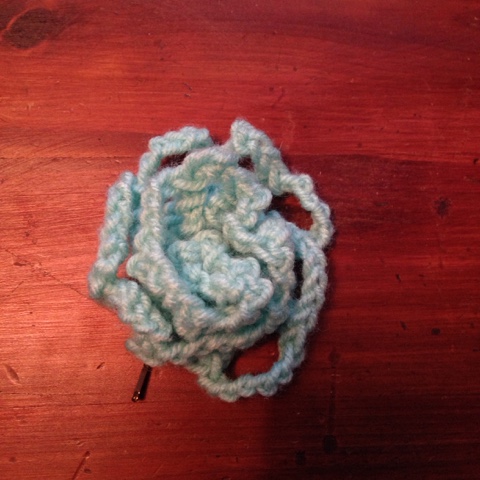
~A hand crocheted flower barrette.


~Elastic hair ties

~Peanut butter cups shaped like bunnies


~And a small container of bubbles 

All color coordinated to your handmade bag of course. 


If you were to want to customize your order feel free!
just include your requests and we'll see what we can work out.

To order Email me at miahgrace222@gmail.com or facebook message me here.

Thursday, February 25, 2016

Throw Back Thursday

This is my first TBT on TheClassySavige blog!

and as such I figured that it should feature something truly special and wildly popular.

My Sierra! 


I don't have a dress mold and it looks rubbish when it isn't on so naturally I posed in it with a turtle neck on!

This is my first bra, my second time working with stretch and my third time working with elastic.
so I'm pretty proud. 

The fabric is an up-cycled cotton jersey.
(my dad's old shirt)
And I just used white braided elastic from Walmart to finish the edges. 
All of the findings are scrapped from a old nude bra that fell to shreds.
And the pattern is by the lovely Madalynne, It's a free PDF pattern. 
find it here~

I'll admit I was very skeptical about this bra. 
No wires? doesn't that mean no support? 

NOPE!

this bra holds. it.  DOWN!

Madelyn is a bra wizard. I firmly believe this.
I have worn this thing at least once a week since I made it.

And I will be making more~

Saturday, February 20, 2016

A Costumers Dream

I'm Everyone who costumes shows wishes that there were some magic outfit that just fit everyone. 

You could use it for a lead in this show, stick it on an extra in this one. Use it for costume parties and tea socials. 

But alas, 
Every person has a body as unique as their personality. 

There is no such thing as one size fits all....or is there? 

I had a stroke of genius while in the shower a month or so ago. 
And that gift from the muses was this self drafted skirt!


And here it is on my fantastic father


It could fit anyone!
and he was the only one home...


This skirt goes from a waist size 34 (or less) to a size 51 1/2!

So here's how I did it. I laid out my fabric and I figured out the smallest circumference I wanted for my skirt. (Which was 34) I divided it by two (17) and divided that by two as well (8.5) 

Then I did what I would for a basic floor length skirt and I drafted three panels with a tapered end. One with the smallest end measuring 17 with seam allowance and two measuring 8.5 with seam allowance. 


Then I grabbed my contrasting fabric and marked off the length I wanted and decided on how much of this fabric to sacrifice. 


Then I drafted four panels with a taper. They provided an extra 4" each on the tapered end. 

Now from here on I forgot to take progress photos. 

I was just so excited!! 

But what I did was sew the four panels of contrasting fabric together to make two tapered panels. These would be the side of the dress. 

Then I stitched the half panels in the floral main fabric together so I had two floral panels matching in size and angle. 

Don't cha just love geometry!

Then I made a little four little straps in the floral fabric to go on the sides of the dress. 


These just blend away, giving the corset detail the spotlight! 


The next time I construct one of these babies in going to make the side panels larger and the main panels smaller. So the corset detail is more noticeable. 

But all in all I think I will get a lot of use out of this skirt!
 And I have enough fabric left over to construct a matching adjustable  top!

Monday, February 15, 2016

cloche Hats~

Who doesn't love hats!

Jerks that's who!

I Scoped out the inter-webs and found a free pattern with KILLER instructions

And I made three right away! 

One wool in size 25"


A brown canvas hat in size 24". 


And a "big sister" in the same fabric but made in size 25". 


I opted not to use interfacing, my fabric was stiff and I wasn't in the mood for a Walmart run.
I'll let you know if I later regret the decision.

But I'm sure you are all wondering about the juicy construction details!
The construction was simple, the hardest part is attaching the lining and brim. 
I just treated the brim like it was bias tape and stitched it in that way. 


This pic is probably a bit confusing to look at but I have the lining inside the hat and it's being sewn in with the brim. 

After connecting the brim I stiched it down and it turned up looking like top stitching. 


I'm planning on decorating them somewhat simply. 

But since I don't know which costumes they will be paired with I'm going to hold off on that a bit.

But they will be extravagant!


Thursday, February 11, 2016

From Grandma's closet to the Film roll.

My Grandma donated an outfit to my costuming efforts and I'm quite excited for this Re-Fashion costume! 

The money piece of this outfit is the skirt.


The velvet shows up on camera nice and I'm honestly considering this skirt for the leading lady in my project. 

What do you think Rebecca? 

There's a shirt that will be turned into a under-corset peasant shirt. 


I'm thinking maybe with green? Or creme? Perhaps pink? Who knows what the future holds! 

Also this vest was also in the pile... 


well...

The buttons are nice....


I guess you could say this vest had a silver lining!

Tuesday, February 9, 2016

Homecoming and lace

My significant other invited me to homecoming and I didn't have a thing to wear!

Well I sorta did....


Oh hi mom
I had a swoonworthy skirt and a creme tank top. 

Not quite homecoming appropriate. 
I had a week and eight dollars.

so I decided on making a versatile overlay that I could wear to homecoming and with shorts in the summer. 

I picked up this lace at JoAnn's I used my handy dandy 50% off coupon and bought just a sliver


 (and used every scrap!)

I planned it out to be sleeveless and to drape over my shoulders with a head hole and two side seams. 


I layered my favorite tank top over the fabric with the folded end on the shoulder seam. 

Then I cut the lace ever so carefully and scalloped the neckline and straps


Like so~
Took forever! And boy was it terrifying... It felt like performing surgery.


But it was oh so rewarding~ 
I treated all of the scalloped edges with liquid stitch.

 It's a Latex fabric glue that's GREAT for treating edges and corners that seem weak to you. 


I highly recommend it.

All that I had to do was stitch up two seams!


Tucked in it's a classy overlay


Un-Tucked and it's got a killer Stevie Knicks vibe to it. 


Or maybe Stevie Knicks's grandma.

And it sparkles~


Friday, February 5, 2016

The best gift for the best sister.

My sister is a freak for organization
And lately I'm a freak for making bags. 

You see where this is going right? 

I made my staple box bag, a makeup brush roll, as well as a taller bag. 


The box bag is nothing new, but I must say I'm proud of this lining. 


And the pull tags. 

This makeup brush was something all new for me. 


I cut out a rectangle of my outer fabric, my lining fabric and of some felt. 
This did need some interfacing. 

I sandwiched them together and I finished the edges with bias tape. 

And that yellow strip to hold the brushes is fold over elastic. 


Which is by the way not iron safe...

And my tall bag was simply an experiment to use up the rest of my fabric. 


This is not interfaced as well, but it holds its shape nicely. 

~All in all this is a pretty swell gift set~


Monday, February 1, 2016

Christmas with the kiddos: lyndonna


The youngest of the munchkins is lyndonna.

No that's not her real name but all her siblings got cool nicknames so she gets one too. 

Lyndonna is a little tiny baby girl, only three months old. So I decided that I could just whip something up for her. I thought it would be easy.

I WAS WRONG. 

I downloaded this free pattern, myrtle the turtle.


I went digging in my fabric chest looking for anything green. All I found was a flannel flower power print fabric. And the only fabric that complimented was an old pink shirt of my moms (thanks mom)

Since it's a knit shirt and I'm pairing it with a woven I decided to interface the prices to a quilting fabric that I was never going to use. 


Look at it...mocking me....

This little sucker was so incredibly hard to sew.
My machine wouldn't sew through it...so I had to hand sew it. 
I don't have any progress photos but I have a finished picture. 


Those eyes were an after thought..


Am I incredibly proud? Not really. 

Is this a turtle for a baby who won't even notice the lumps and wrinkles? Yeah, it is. 

ce la vie~ 🐢

And Speaking of Pants...

Doesn't everyone have a favorite pair of pants? 
maybe they're well worn and fuzzy feeling on the outsides, or stretchy in all the right places.
interesting knee details or fun pockets perfect for your day to day life. 

I have a few favorite, and on my oddest pair the button ripped off...


I found this pair at goodwill fresh man year and fell head over heals in love.
I don't know what it is about those useless over decorated pockets and oddly placed seems that made me swoon~

But oh do they make me swoon!

This hole was a big one, so I needed to darn it before attaching any thing to it. 


Or risk the chance of making it worse.

and then all that was left to do was choose a button.


It was a harder choice than you would think..

But I finally made up my mind!


Only to discover that during the three months these pants were sitting in my project bin I grew two pants sizes.

Know anyone size six who wants over-detailed, low-rise, flare-legs?


Un-sweet sweeties.

My boyfriend's grandma is just the sweetest thing in the world.

And in a strange twist of irony she's diabetic. So my normal back up plan of buying candy wouldn't work. 

So I /of course/ made a bag. 
And filled it with non edible sweeties. 


Insta-dry nail polish and apple pie flavored lip balm. 

and the Youtube video I used for this bag is here~
The only change I made to The Crafty Gemini's tutorial is I did not interface.
My courdoroy fabric was very stable so I didn't really need it.

Also I didn't use her measurements. 
I just sorta eyeballed it.


~I'm quite proud~

Translate